Showing posts with label yarn crafts. Show all posts

24.1.17

Knitted romper.


During the past year or so, I have become utterly obsessed with knitting.  In fact, if you've followed me on instagram, you'll see that that's what I've been up to, whilst seriously neglecting my blog.

I discovered some gorgeously knitted baby clothing while scrolling around Pinterest, which led me to connect with some instagram feeds that are just to die for.  Soft, cuddly, cute, cleverly-designed baby knits everywhere.  One gorgeous feed would lead to another - pictures of babies dressed top to toe in snuggly bonnets and rompers, topped with beautifully textured cardigans in the most gorgeous colours - I fell so much in love, I could hear little cartoon hearts popping all around my head.  It's stuff to make you swoon.

Most of the designs in the feeds I've been stalking are made by mothers and grandmothers in the Scandanavian region - most predominantly Norway and Denmark, where I guess knitting is a way of life due to the cooler climate.  These ladies seem to knit up pieces in the blink of an eye - a photo posted on their feeds of a cast on row seems to materialize into a fully completed garment three days later, and often they are working on three or more projects at one time.  It's mind-blowing!

And the fact that many of these very talented women now sell their patterns online is wonderful news for everyone who loves to knit.  And many of them have been translated into English, which is even better news.

I have always been in love with rompers and bonnets; both when I sew, and now also when I knit.  This romper is made from a design by Ministrikk, and is a wonderful pattern to start with if you are looking to dip your toes into knitting something beyond bonnets or booties for a baby.  Ministrikk offers many (though not all) of their patterns in English - you can check out which ones by clicking on the 'English' tab along the top of their page.  The patterns are sent to you in PDF form once you've paid via Paypal.  So you can buy it, pay for it and be knitting it ten minutes later ;)


The pattern is for a textured, vintage-styled romper that is knitted flat in two pieces and sewn up at the sides, with the straps buttoning at the back waist.  I've not yet knitted a romper with the textured pattern, but have made a few simple versions in plain stockinette, or with a pattern running up the centre.


The romper above is knitted with a panel of lace running up the centre.  I used chart A1 from the Sweet Alice dress from the Drops Design site.  The pattern is 16 stitches wide, and I needed an odd number of stitches so that the panel ran smack through the centre of the front, so I reduced it to a 15 stitch wide pattern by eliminating one of those purl stitches (symbolized  by the black dot) in the middle of the chart. 


The yarn I used to knit this was the Debbie Bliss Baby Cashmerino, in Duck Egg blue (I think)  which is probably slightly thicker than the yarn recommended in the original pattern.  But I can never say no to this yarn, it is super soft and snuggly, and comes in so many beautiful colours!

This is a wonderful and easy to read pattern - it's been translated perfectly.  I find that alot of patterns from this part of the world are very differently written from ones that originate from the UK and Australia (which tend to dole out row by row instructions), so at first glance, it may be a bit strange.  But after reading through it, it all becomes quite clear and straightforward.  (Note: this pattern includes short row shaping in the back.  If you're not familiar with short rows, or any other technique on any knitting pattern, YouTube is a wonderful resource!)

And no, sadly, I don't have anyone to dress this in.  That's probably the worst thing about my knitting addiction.  All this squooshy, knitted goodness and no one to play dress ups :(  I'll be graduating onto knitting larger sized pieces for my kids soon, but in the meantime, these cute baby knits have me hooked.


2.3.14

Seeing squares.


I had a heap of colourful yarns that I needed to get rid of, and there are only so many things that one can decorate with pom poms, so I started crocheting these flowery-type granny squares.  At first, I was just going to make a three-by-three square cushion, but that seemed a bit miserable.  So I decided to make a larger four-by-four square cushion.  After crocheting sixteen squares, I looked at my pile of yarn scraps and decided I would make a few more, just so I could see which colours I liked the best and then mix and match my resulting pile of square to get the perfect colour combination for my cushion.  But I liked them all.

So, I thought, I will sew them together to cover a pillow.  But as pretty as a granny square pillow sham would look, I wouldn't use it - I'm quite tactile defensive, especially when it comes to my face (having a facial at the beauty spa is my worst nightmare)- and the thought of all that fuzzy wooly stuff so close to my eyes and face and neck makes my skin literally crawl.  So, I decided that I would make a cot sized blanket instead.

By this stage, I had used up most of my scrap and was actually buying more brightly coloured yarn to make more squares.  And as I was crocheting all my newly purchased yarn into squares, I thought to myself, "I don't have a baby.  I'm not planning on having a baby.  And I don't know anyone else who is having a baby.  If I make this cot quilt, which is now costing me money, it won't get used!"

At this point, I was getting rather cross with myself.  "I will have spent all this money to make something that I cannot even use!!!  Why did I start making these stupid squares?!"  I actually got irritated to the point that I stuffed some of the squares up quite royally, and had to unravel them and re-do them.  I couldn't throw them away - Lord, no!!   I am at a point of no return now because of all the money and time I've invested in these silly little squares.  I am obsessed with doing this, and finishing it.


I'm quite sure they call them granny square quilts, or rugs, or afghans, or whatever the word de jour is, because by the time you make all of your squares, tidy up all the yarn ends, sew them all together and THEN crochet a border all around the thing, you will BE a granny.  Possibly, a great granny.  And more than likely, one with severe arthritis in your hands.

So, where am I at now?  I have decided that instead of making a useless cot quilt, I will be making rug to fit a single bed (Sophie's single bed, Cameron has a king single which is considerably bigger, and besides, I don't think he would dig all the pink I used).  So I'm hoping to get it finished before Sophie inherits Cameron's bed.  And I've  made about sixty of these squares already, so by my rough calculation, I would hazard a guess that I have, say, approximately two hundred and eighty thousand to go.

I would say stay tuned, but I'm guessing this isn't going to be finished anytime soon.  Unfortunately.


23.7.13

Easy kids' pom pom scarf


This is the scarf I started a couple of Sundays ago.  A lovely, long, plain-stitched one that I was able to pick up when I had a couple of minutes and mindlessly click away at.  It was especially nice having something constructive to do while being forced to watch 'In the Night Garden' for the hundredth time and watching Upsy Daisy have her daily conniption fit.

As I was knitting it, Cameron showed a keen interest in how quickly it became so long (..'can I measure it now?' 'How long do you think it is now?'  'Hold it up, Mum, let me see how long it is?' 'Wow, that sure is long!'  'Can I measure it, again?).  Gosh, I was glad when it was done.


Do you want to make one?  It's easy!

You need:

A pair of 4mm knitting needles
100g 8 ply yarn (I used Moda Vera, which is a soft acrylic) for the scarf
50g 8 ply yarn for pom poms (or raid your scrap box)
Optional:  A pom pom loom

Cast on 6 stitches
First row:  Knit into the front and back of the first stitch (you've increased one stitch!), knit to end of row.

Second row: Knit into the front and back of the first stitch (you did it again!), knit to end of row.
Repeat the last row until there are 24 stitches on your needle.  Knit every row until work measures approx 115cm (you can make it longer or shorter as you wish).

To shape end -
First row: Knit 1, knit 2 together, knit to end of row.  Repeat each row in this way until 6 stitches remain on your needle.  Bind off.

Make two pom poms (mine have a diameter of about 7 centimetres)  I made mine using the larger end of a pom pom loom, but if you don't have one, you can make them the old fashioned way.

I was worried Sophie might not take to her new scarf (she has learned the phrase 'I don't like it' and uses it with reckless abandon, especially in regard to food and clothes, and at the most inopportune moments).  But she did well to keep this on for two minutes before unravelling it from her neck and throwing it to the ground, charging at her brother and poking him in the eye - I actually think the neon pink pom poms served as a distraction, sort of blinding her into submission.  That is, until she got used to them.  If you happen to make one, I hope you have better luck.


7.7.13

Sitting and knitting


It has been sooooooooo cold the past few days.  I've taken my knitting sticks and yarn, found a nice spot on the dining room floor where the sun streams in through the window, and have just plonked myself down and clicked away.   I'm making a quickie scarf for Sophie, and as you can see, it's  nothing too complicated, as I am having to get up and down quite frequently to wipe little runny noses and find clean hankies for bigger ones. 

27.6.13


I'm child-free today and instead of chipping away at my very, very long to-do list, I have been thoroughly distracted making pompoms with a fork.  It's addictive.

I've referenced this tutorial at Vivid Please once before - I think it's so clever!  But now I've spent the last hour or so making lots of pompoms, and messing about stringing them on odd bits of fabric, I've gotten  increasingly cross at myself, and with only an hour until school pick-up, I really, really should make a start on that list...

Oooooooo, fun!

...or maybe I will have a coffee instead, and make just a couple more.

20.2.13


Although it is still summer and at the time of writing, we are all cranky and worn out after yet another forty-plus-degrees-celsius day, we were lucky to have a small taste of autumn last weekend.  The cloudy skies, a brisk wind, a bit of rain (just a little bit, mind you) has me all excited for the cooler months ahead, dragging out all those lovely cosy winter woolies and dressing the littles all toasty warm.

However, sometimes winter-day clothing can tend towards a little drab.  These colourful little pom pom hair elastics are a fun way of brightening up an otherwise dull outfit.  Also, they're a great way of using up yarn scraps and teaching your kids how to make fun accessories for themselves.

Firstly, and obviously, make some pom poms.  Pom pom makers are quite cheap; I bought mine from a discount gift shop.   Of course, you can use the traditional method, which takes a little more time, or if you want to make smaller pom poms you can use this very clever fork method.


Use a long length of yarn when you tie your pom poms through the centre before clipping them, you'll use these later to tie your pom poms together.


Clip your pom poms into nice neat round balls (taking care not to clip those long yarn tails).


Now you can pair them up into whatever colourful combinations you like.  Using the yarn tails, tie them together securely.
 

  Then tie them onto hair elastics securely, clip the tails off and they are all done.


You could tie some lengths of ribbon onto the hair elastic if you wanted to, either tying them in bows or just leaving them free like streamers.  I don't do this because ribbons flapping and tickling about her head would make Sophie aware that something pretty is in her hair, and she would immediately pull it off.   When it's just the pom poms, she thinks she just has normal elastics in her hair.  They don't seem to add any extra weight to her head, which is great.  And a bit sneaky.

20.6.12

Make a shooting star pin - tutorial

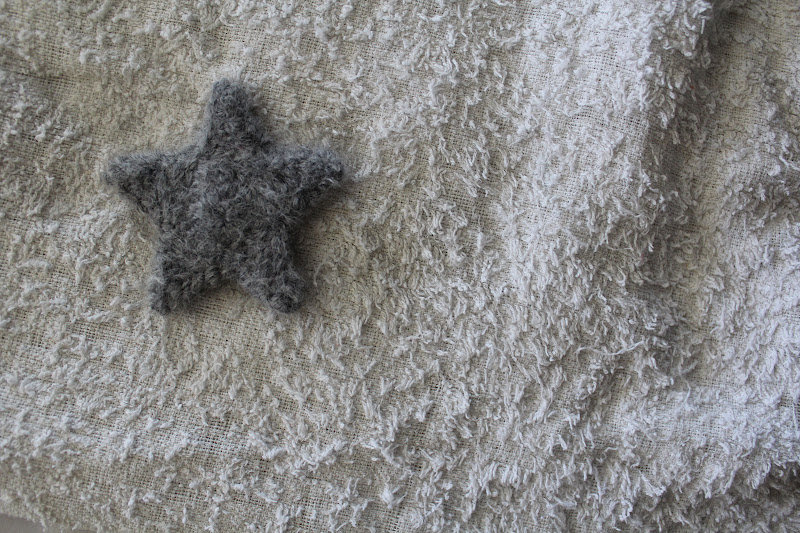
I've  just about finished sewing Sophie's coat, and although I must say I am extremely pleased with how it's coming along, the dark grey fabric makes it look a little austere for an especially sparkly (and naughty!) toddler.  I decided to make a star-shaped pin to wear with it, but wasn't sure whether to sew or bead or find a star blank to paint.  Then, I remembered this crochet star tutorial.  After doing a few test stars and deciding they were just what I wanted (and dead easy!), I made this pin in about an hour (not including drying time after felting the star).  Here's how!

What you need - 

-100% pure wool yarn (8ply, suited to knitting on 4mm needles)
-3.00mm crochet hook
-Some flat, flexible plastic (I cut mine from the side of a plastic milk jug)
-A long-ish needle to sew your front and back stars together
-Ribbon of your choice (something a bit stiffer than satin, like organdie or stiff nylon
-Brooch finding or safety pin
-Sequins, seed beads, etc. to decorate (optional)

For felting -

-Two bowls, one with water from kettle that's just boiled and a little squeeze of dishwashing liquid, and one with cold water, and a couple of ice-cubes, if you have them.
-Rubber gloves (so you don't burn yourself!)
-A towel
 
What you do - 

With your yarn and crochet hook, make two stars using the crochet star pattern  found at the (wonderful!) Foothill Home Companion.  I admit that when I first eyeballed this pattern, I thought it looked tricky, but it's not at all.  The stars work up really quickly, and I can think of a tonne of projects I want to use them in.  I'm not too cluey with all the different trebles and I had to google some of them, and the instructions I needed were found easily. 

After your stars are made, weave in any loose yarns or tails.  You can pop a couple of stitches through the hole in the centre too, if you like, just to close it off.


Take your plastic and trace one of the star shapes roughly onto it. 


Now, cut out the shape with some tough scissors, but cut a few millimetres inside the line you drew because it has to be smaller than your woolly stars.  Just trim away a bit at a time until it looks something like this. 


Take a length of yarn and strip a couple of ply from it to use as thread to sew your stars together.   Now, the plastic star will be sandwich between the two stars and will help to keep it  rigid.  Curly arms and legs on a star look a bit lame.  The best way to get it all together is to place your yarn stars wrong sides together, sew one or two points together using an overcast stitch (see my amazing technical diagram below)...


... then slide the star shape in, and then continue sewing the remaining points around the rest of the star. 


All done.


Oooo, now it's time to felt.  I love this bit!  Get your bowls of hot and cold water set up and don your gloves.  Plop your star into the hot water, and rub it to mat up the fibres.  My gloves have this friction-y type surface on the palms, so I rubbed it between my two gloved hands.  Or just rub it between your fingers.  Do this for about a minute.  Then dunk it in the cold water to the shrink the fibres you just mushed up, and mush it up a bit more.  Do this for about a minute, too.


Keep repeating this process until you can't see the crochet stitches anymore, and it looks more like felt than crochet.


Rinse in some cold water to get rid of the soap, and then press between two layers of towel to squeeze out as much water as you can.    Shape it with your fingers a bit to get the star shape as you want it, and leave to dry on the towel.


While your star is drying, cut some lengths of ribbon.  It's best to cut them a bit longer than you want the end result to be because you will trim them later.  Shape them into a tail formation, and when your happy with them, stitch them to hold their shape.  


Once your star is dry, stitch the ribbon tail to the back...


 ...then stitch your brooch finding on.   Clip the ribbon to a length that it's not floppy and trim the tail of your ribbons diagonally.  I like to spray mine with a bit of hairspray to keep the ribbons nice and stiff, and stop the ends from fraying.  And there you go...


Ooo, and add some sparkly bling if you like!


And don't forget that when you're wearing your shooting star pin, you are allowed to make wishes all day long.  It's the law.

23.7.11

How to knit a silly hat....

...for a crazy kid.  Lord knows what's going on inside that head.


Although I tried, I couldn't convince Cameron that a conventional beanie with a single pompom on top was better than looking like Blinky Bill.  But he's only six, so I will excuse his lack of savoir faire with regard to his headwear.  His friends probably won't.


I have been knitting for years, but don't extend myself too far beyond casting on, knit stitch, purl stitch, and binding off.  If you throw a cable or a bobble into the mix, I become thoroughly confused and afraid.  Besides which, it's a hat for a child, and will thus be lost or ruined within a fortnight anyway.  

Materials:
16 inch 5mm circular needle
Pair of regular 5mm needles
3 x 50g balls 8ply yarn (I used Moda Vera pure wool)
Stitch marker
Yarn needle to weave in ends and sew pompoms on.

(Note: at rest, this hat measures about 44 - 46 centimetres.)

Cast on 88 stitches.  Place a stitch marker onto your right needle to mark the beginning of the round, (and be careful not to twist your stitches!)  Work in single rib (K1,P1,K1,P1 etc.) for 24 rows.  Then work 33 rows in knit stitch only (your hat should measure 23 centimetres from beginning row).  Transfer stitches to regular needles (44 on each needle) and bind off using the three needle bind off method (use this excellent tutorial at good ol' Knitty.).  Now, I use my circular needle as the third needle when using this method.  You may not like the feeling of your circular needle bouncing about, so you can use a similarly sized double point or regular needle.   Make two pompoms with a 6.5cm outer diameter and 2.5cm inner circle (go here if you are pompom illiterate) and attach to the corners of your hat.  Weave in the ends, fold the  brim up and stick it on your child's head.  Point and laugh.


I know you are probably feeling ripped off and thinking to yourself, "That's a knitting pattern??!"   Apologies, but it is in my world.  Admittedly, it looks really very slack when you write it down and include other sites' links for all the tricky bits.  Those bloggers and instructors are a whole lot smarter than me.  Kudos to them!  Yes, when it comes to complex knitting, I have to confess that I am no Russell Crowe.


See?  Now, that looks like serious stuff.
Related Posts Plugin for WordPress, Blogger...