

But it's still nice to express some adoring sentiment to those you love (though not too soft and soppy- yuck!); be it your partner, your kids, or your best girlfriends. But, if you had to buy a card for every single one of them, you'd soon be dirt poor, and they probably wouldn't love you as much. Oh, just kidding, of course they would. But they would probably love you more if you could afford to take them out for coffee and a nice piece of cake, instead of spending all your money on some garish, glittery, heart-infested card which will be banished to a drawer (or bin) once Valentine's Day is over. For me, coffee and cake is always preferable.
So, save your pennies for cake and instead make a simple garland for your Valentine. Mine cost under a dollar, but you could easily make it for nothing with cardboard and string that you have about the house. If it's not too gushy or gauche, it could be left up all year long.
What you need
Thin cardboard. I bought mine at the newsagent for fifty cents. Or you might find something suitable about the house (old greeting cards, packaging, etc)
Scissors
Glue
Craft knife (not essential, but handy)
Double sided tape (again not essential, you could use glue instead)
Something to string your message on. I used black crochet cotton I already had. Twine, fishing line, cotton yarn, etc. could all be used. Of course, the length of the string depends on how long your message is, what size font you use, how you decorate the ends (if you're going to) etc. Give yourself about 12 inches or so longer than s generous guess at what you think you need. It's easier to cut of the ends than have to start all over again!
Other optional things - small washers for weighing down the ends of the string
pretty coloured cardboard or sequins, little pompoms,beads etc to decorate.
What to do
Think of something short and sweet and adoring you want your garland to say. But here's the thing, there are certain letters of the alphabet worth avoiding. Like the letter O. It is really difficult to cut a perfectly round O with a pair of scissors - you end up with jagged edges and bad symmetry. Well, I do. And, yes, I know, the words 'love' and 'you' contain this pest of a letter. Also, the letter B, or R, or any other letter that has a space that you have to trim out with a blade is a bit painful, too. Think outside the square and try to come up with a sentiment that has very few of these pesky letters. (I am not a fan of text-speak, but it could really help you out here). Or you could use a font that is more squared.
The font I used was Arial Black, with a size of 150, but you can choose whatever you like. Print out your message on some paper. This is your cutting guide

Trim along the top of the letters in a straight line, so there is no free space. This edge will be place on the fold of your cardboard.

Take the cardboard your using and along one of the long sides, fold it - how much you need to fold it depends on how big your letters are. You'll be gluing the letters along the fold of a double thickness, so when folded the cardboard needs to be the same height as your letters, plus about a half inch. (Important - if you are using a fancy cardboard with a design or effect on one side, fold it so that the design is on the inside. After cutting, the letters will be turned inside out - so to speak).


Cut out the letters using scissors and/or a craft knife. (I could use scissors for the bulk of my cutting, but used a knife to cut that little gap out of the A). Fold the letters back so that the cutting guide is on the inside - when stuck together it will not be seen.

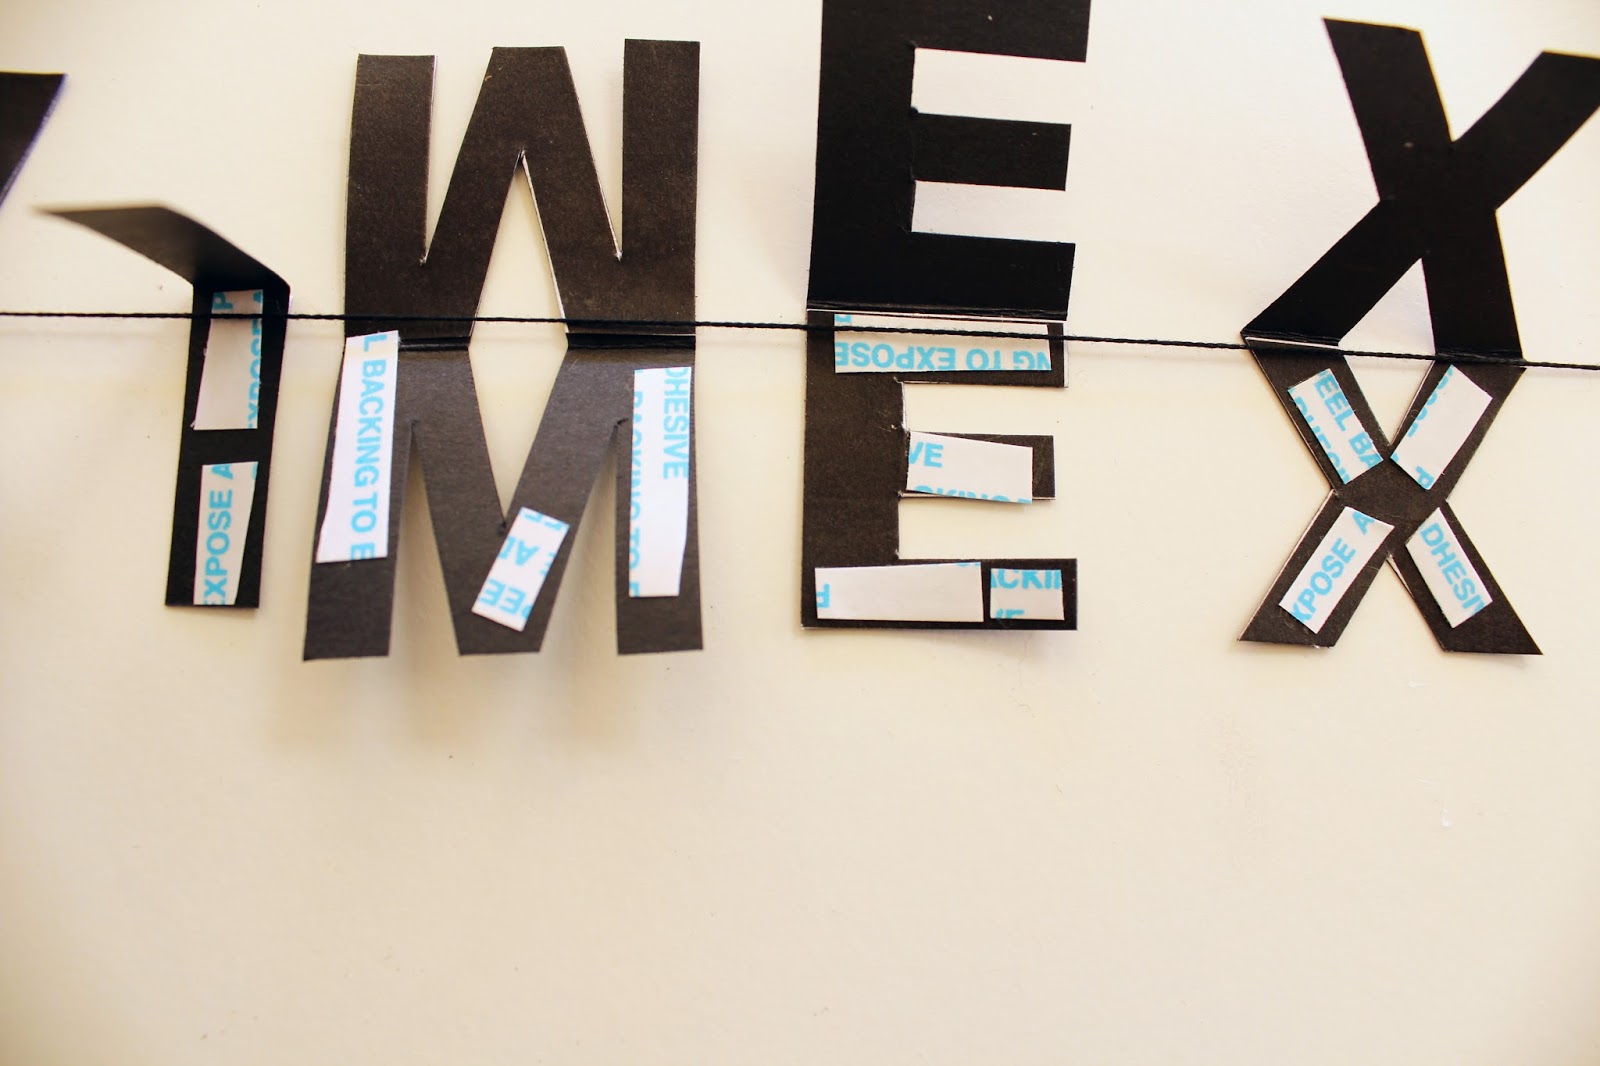
Tape the two ends of string to a flat surface, making sure the string is taut but not tight (having the string taut will assist you in spacing the letters correctly - if it's loose the spacing won't be as uniform). Fold the letters over the string and arrange them.

Stick the inner surface of the letters together, using glue or double sided tape. (I prefer tape because it doesn't wet the paper and make it bubbly when it dries).
And here it is all stuck down. Un-tape it from the board, it's basically done.

Now, you may want to decorate the ends. I used some stars for mine, because I am a bit over the whole love-heart thing, but of course you can use hearts, kisses or something else. (Tip: I tied small washers to the end of the strings to give them some weight, and then sandwiched these between my star shapes.) Or some sequins or beads or small pompoms, or whatever you like.

Pack it up in a nice little bag (being careful not to tangle it) and give it to your Valentine. Or surprise them by hanging it up where they can see it - a window, the bathroom mirror, a door-way (obviously, this is only advisable if you actually live with them or have been given a key to come and go as you please - of course, breaking into someone's house to string up messages of love is just creepy, not to mention criminal).

Happy Valentine's Day. I hope you get lots of kisses and cuddles and flowers and love and stuff.
By the way, here's my Valentine *swoon* - I love this kid! (...and there's the exclamation mark!)

New follower from the Netherlands! Love your blog!
ReplyDeleteHugs, Pietrik